Before she arrived I stripped off all the old wallpaper and Jay removed all the baseboards and door trim (three doorways are involved.
The Venitian Plastering is quite an extensive process. It involves several layers of a colored plaster like substance which comes in paint cans… looks like paint, but it’s much thicker and is applied with a flat semi-flexable trowl in short criss-crossing strokes.
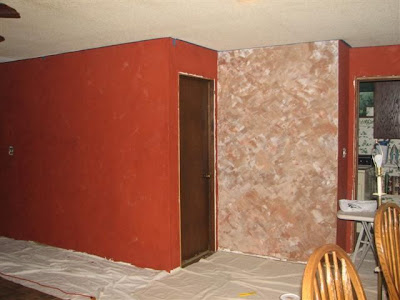
The first wall she did was the small multicolored one below. It was basically an experiment because she’d never used more than one color at a time. She started with a mostly white effect and began incorporating the brown and small amounts of red into it. The first couple layers seemed too “white” and sterile looking so she just kept adding more color until we finally decided we liked the effect you see here. We let the wall “grow” on us and decided it was a keeper, but that effect would be too “busy” for the other walls, especially the long one.
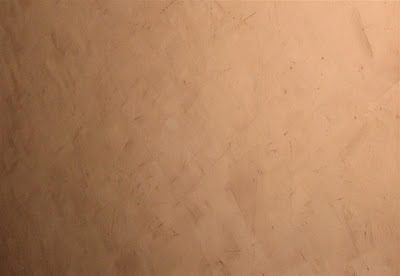
Here is a close up of part of that wall:

We decided that those walls should have more of a one color look. Since she had a whole can of red plaster left over from another job, we used that for the first coat, not intending for any of it to show in the final result. It would be only one of three or four layers.
We toned down the brown with a little white to lighten it a bit for the second coat… AND to make sure there would be enough brown so that we wouldn’t have to go to Home Depot (30 miles away) to buy more.
Here is Rinnah hard at work. You always have to keep a “wet edge” so there’s no pausing until you reach the end of a wall and this is a long one.

We even considered leaving some of the really small walls red (kind of a brick color) but quickly discarded that idea.
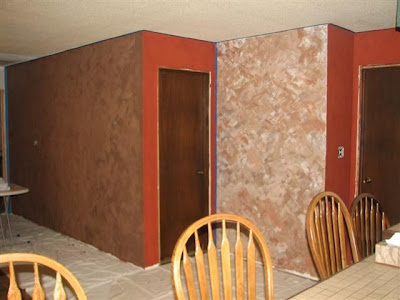
After a second coat of brown, we were done. I say “we” only because I was very involved in a supervisory role. I did help with the red undercoat, but really couldn’t get the knack of the criss cross thing, which is important to the final look. It is not meant to look smooth… although it IS smooth, but the underlying texture in each layer shows through.
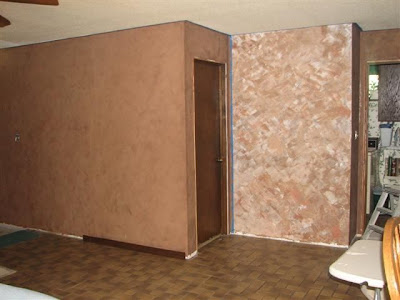
The final step is “burnishing” which means polishing. It requires using a flat stainless steel trowel and applying a lot of pressure to polish the wall until it shines. This brings out the depth and texture of each layer even more. When I say texture, it’s only visual. When you touch the wall, it’s as smooth as glass, maybe smoother… it has a unique feel that is really amazing. I know that when people come to see me one of the first things I’ll be saying to them is “go feel my wall”…
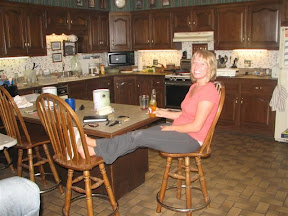
Roger provided all the muscle power to do all the burnishing on all the walls. (Boy, that's a lot of "alls" all in one sentence.. which I assume is not at all gramatically correct. ) Because it requires a lot of pressure it’s not easy, especially the high and low parts of the wall. Rinnah joined me in the supervisory lounge during that phase.
The original plan was to have a little party for all the men in the family that we could round up… and maybe host some sort of competition… but as it turned out Nathan and Amon were both involved in helping Jay split wood all day long. (And Roger… good guy that he is, ended up joining the wood splitting team AFTER he finished the burnishing… but that’s another story.)
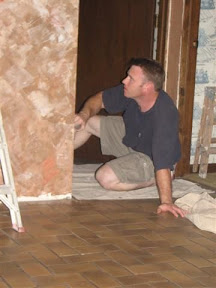
Roger goes “high”:
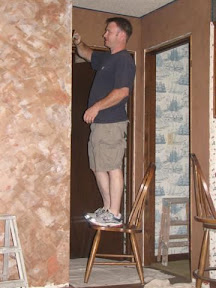
Roger goes “low”:
Supervisory lounge:
I tried to take a picture that would show the shine, depth, and what I call texture (even though it's actually smooth) after the burnishing, but it didn’t show in the picture.
While Rinnah was working on the plastering, I assigned myself to refinish the baseboards and door frames. I sanded them down lightly, restained and re-varnished them (hoping to disguise the years of abuse they’d suffered through 25 years of co-existing with our large family.)
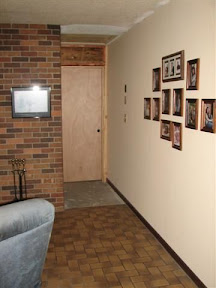
I got Jay to put the long baseboard back and then I tried to recreate the arrangement on the wall I had before for all the “school pictures” of my kids and grandkids.
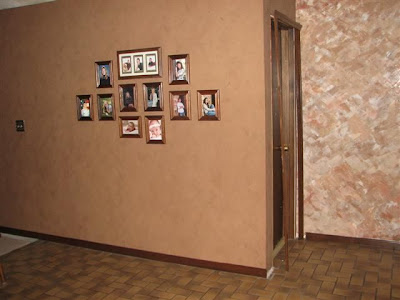
I had hoped to have a final picture with all the door trim and baseboards in place, but it seems Jay isn’t much in the mood for putting them up right now… or something. At least I have that long one where it belongs and the rest can just wait I guess. Hopefully not too long.
All through the process, Rinnah and I kicked around ideas for what to put on the multicolored “focal” wall. We talked mostly of a large black and white framed picture or maybe two… but I also have a large wood frame with a brick colored mat that might work if I could figure out a black and white photo to enlarge to that size… WE loved the brick mat with the wallpaper.
Another more likely option is to hang a framed mirror there. I’m working on that idea now and kind of like the way a mirror reflects the natural light from the windows on the opposite side of the room. Time will tell on all that. Hopefully not too much time but I wouldn’t count that out.
(This post was my first attempt at using a different process for including pictures by uploading to Picassa Web Albums and linking to them. There are fewer options for arranging them, but it's somewhat easier in other ways. I'm still experimenting with this.)
ADDENDUM...
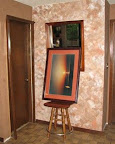
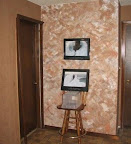
I just took some pictures of some of my options for that multicolored wall... none of them are hanging (or sitting) at the exact right height, that will come when I decide what I am going to do.
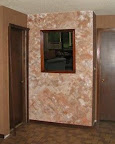
The mirror frame would need to be sanded and restained to dark walnut like the rest of the wood trim. I do like how it reflects the light from the windows. I looked at a few other mirrors in stores and if I could find just the right one I'd buy it... but that seems unlikely.
The picture frame might be a little large and strange shape to find just the right picture to put in it. (I was thinking of a black and white print of some sort. I like the color of the mat. The picture is a sunset. I considered just hanging it sideways (as shown) and pretending it's not really a sunset, but simply "art".
The other two smaller pictures have the black frames and black and white pictures. They are too low (and belong on another wall), but something similiar might work if hung just right.
.jpg)
No comments:
Post a Comment